The Art of Crafting Fragrant Shredded Chicken Curry Bao

Introduction

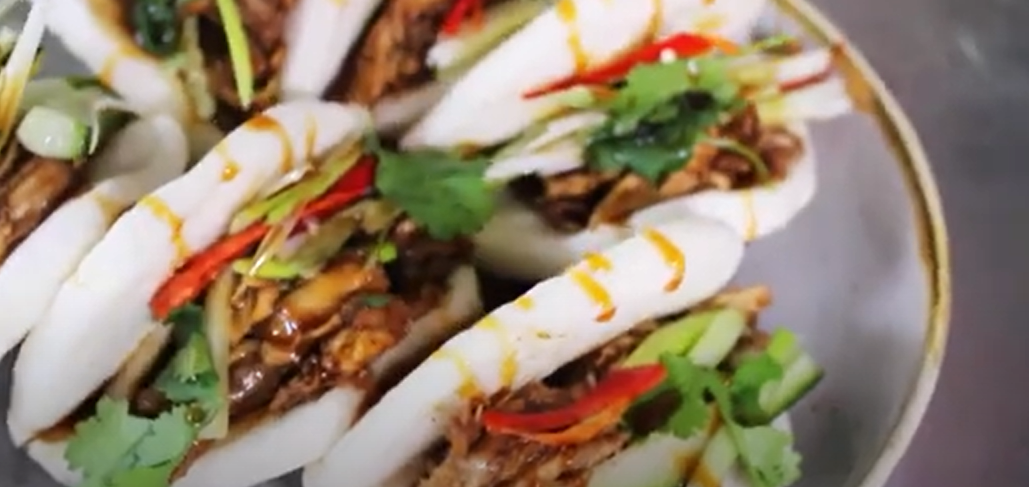
Bao, with their soft, fluffy exteriors and fragrantly spicy middles, are a culinary delight that originated in China. Also known as baozi, these Chinese filled buns come in various forms, often steamed to perfection. In this culinary journey, we explore the art of creating bao filled with a fragrant shredded chicken curry, an exquisite blend of flavors that dance on the taste buds.
Section 1: Unveiling the Aromas – Fragrant Shredded Chicken Curry Filling

Bao Filling Ingredients

  • 3 tbsp. oil
  • 2 small shards cinnamon
  • 1/2 tsp. nigella seeds
  • 70 g onion, thinly sliced
  • 1/8 tsp. fenugreek seeds
  • 200 g boneless skinless chicken thigh, cut into chunks
  • 1/2 tbsp. garlic paste
  • 1 tsp. turmeric
  • 1 tsp. dried red chilli flakes
  • 1/2 tsp. ground coriander
  • 1/4 tsp. salt
  • 1/4 tsp. pepper
  • 2 tomatoes, diced
  • 200 ml water
  • 1 tbsp. coriander, finely chopped
  • 1 green finger chilli, thinly sliced

Preparing the Filling

To embark on the journey of creating the perfect bao, we start by crafting a fragrant shredded chicken curry filling. Sautéing spices, searing chicken, and allowing the flavors to meld together create a curry that is both aromatic and rich. The addition of coriander and green chilli brings a fresh and vibrant element to the filling.

Section 2: Mastering the Bao Dough

Bao Dough Ingredients

  • 150 g flour
  • 1/2 tsp. yeast
  • 1/2 tsp. sugar
  • 1/2 tbsp. oil
  • 70 ml water

Crafting the Bao Dough

The heart of any bao lies in its dough. With a few simple ingredients – flour, yeast, sugar, oil, and water – one can embark on the path of creating the perfect vessel for the flavorful filling. Whether using a stand mixer or kneading by hand, the goal is a smooth and elastic dough. Allowing the dough to prove in a warm place for two hours is the key to achieving the desired softness.

Section 3: Bringing it All Together – Bao Assembly

Assembling the Bao

The assembly of bao is an art that requires patience and precision. Rolling out the thinly kneaded dough, creating a flavorful pocket with the fragrant shredded chicken curry, and pleating and sealing – each step contributes to the final masterpiece. The satisfaction of lifting the lid off the steamer and seeing these bao puffed up and fragrant is unparalleled.

Step-by-Step Assembly

  1. Dough Preparation: After the dough has proved, it is turned onto a floured surface and kneaded by hand before being rolled out into a thin rectangle.
  2. Filling Creation: The fragrant shredded chicken curry, cooled and refrigerated, awaits its destiny as the heart of the bao.
  3. Pleating and Sealing: The artistry begins as each disc of dough is filled, pleated, and sealed to create a series of delicate pleats around the flavorful core.
  4. Final Touch: Reshaping the bao into a circle, they are placed on a sheet of greaseproof paper and left to prove for an additional 20 minutes.

Section 4: The Culmination – Steaming and Serving

Steaming the Bao

The final act in this culinary masterpiece is the steaming process. Placing the filled bao buns in a hot steamer, a tantalizing aroma fills the air as they puff up to perfection. Steaming for 15 minutes ensures that the bao are cooked to perfection, ready to be served with your favorite dipping sauce or enjoyed as they are.

Conclusion

In the world of culinary delights, crafting fragrant shredded chicken curry bao is a journey worth undertaking. From the aromatic filling to the soft and fluffy dough, each element plays a crucial role in creating a sensory experience that transcends the ordinary. So, don your apron, gather the ingredients, and embark on a culinary adventure that celebrates the art of bao making.

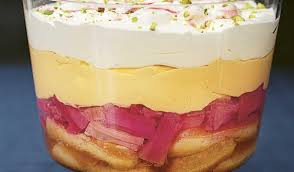
 

The Art of Crafting a Decadent Homemade Trifle

Homemade Trifle

The Art of Crafting a Decadent Homemade Trifle: A Journey Through Layers of Delight

Introduction: The Evolution of Trifle-Making

As a teenager, my trifle-making journey began with boxed trifle kits—a simple mix of custard, cream topping, and a packet of chocolate sprinkles. Over time, I’ve discovered that crafting a proper homemade trifle involves a bit more effort, but each stage is a delightful and achievable experience. Let’s explore the intricate layers that make up the perfect trifle.

Section 1: Deconstructing the Trifle

1.1 Understanding the Components

A trifle is a symphony of textures and flavors, consisting of syrup-soaked cake, juicily-ripe fruit, wobbly jelly, vanilla-scented custard, and dollops of whipped cream. Each component plays a crucial role in creating a harmonious dessert experience.

1.2 The Foundation: Sponge Fingers and Alternatives

The bottom layer of a trifle is typically made with sponge fingers or ladyfinger biscuits. These are often sandwiched together with jam and soaked in liqueur or fruit juice. Explore alternatives like Madeira cake, panettone, brioche, or slices of Swiss roll for unique variations in texture and taste.

Section 2: Fruitful Choices in Trifle-Making

2.1 The Fruit Medley

While summer fruits like strawberries and raspberries are traditional choices, the beauty of trifle lies in its versatility. Embrace creativity with fresh mango, blueberries, mandarin, pineapple, or passion fruit, either strewn over the sponge or used as a decorative topping for the final layer of cream.

2.2 Jelly or Not?

While not every trifle includes jelly, it adds a classic wobbly texture to the dessert. Learn the art of making your own jelly using gelatine leaves and fruit syrup or opt for ready-made jelly crystals. Pour it over the sponge base and witness the distinctive layers coming to life in a transparent trifle bowl.

Section 3: Custard – The Heart of the Trifle

3.1 The Perfect Custard

Powdered custard is ideal for trifles due to its thick texture that sets firmly. For a homemade touch, combine caster sugar, egg yolks, and cornflour, whisking them into a pan of vanilla-infused hot milk. Achieve a substantial consistency closer to crème patisserie, ensuring it forms a stable base for the layers above.

3.2 Custard Application and Cooling Techniques

After preparing the custard, spread it generously over the jelly and sponge finger layer. To prevent a skin from forming, cover the surface with cling film and chill it, allowing the custard to set and provide a luscious foundation for the trifle.

Section 4: Whipped Cream – The Fluffy Clouds on Top

4.1 Sweetening the Cream

The whipped cream is a crowning glory, sweetened with a touch of icing sugar. Whip it until it reaches the soft peak stage, creating a light and airy texture that complements the richness of the trifle.

4.2 Piling it High

Abundance is key when it comes to whipped cream. Pile it high on top of the set custard, allowing it to peek over the serving bowl’s edge, or consider piping it for a more sophisticated finish.

Section 5: Sprinkles and Toppings – Adding the Finishing Touch

5.1 Endless Possibilities

From shavings of milk chocolate and fresh raspberries to sour cherries, candied peel, crushed biscuits, and flaked almonds, the topping possibilities for your trifle are limitless. Explore different combinations to find your unique flavor profile.

5.2 The All-Time Favorite: Birthday Cake Sprinkles

In the realm of trifle toppings, multicolored birthday cake sprinkles hold a special place. Learn how to incorporate them into your trifle for a playful and visually appealing finish.

Conclusion: Crafting Your Masterpiece

In the art of trifle-making, every layer contributes to a decadent symphony of flavors and textures. From the foundation of sponge fingers to the airy whipped cream clouds on top, each step is a joyful endeavor. Embrace the creative freedom trifle-making offers, and soon, you’ll be crafting your own masterpiece—one layer at a time.

Exploring the Delightful World of Chana Chaat

The Irresistible World of Chana Chaat: A Culinary Journey through South Asian Flavors


Subtitle 1: A Symphony of Flavors in Every Bite

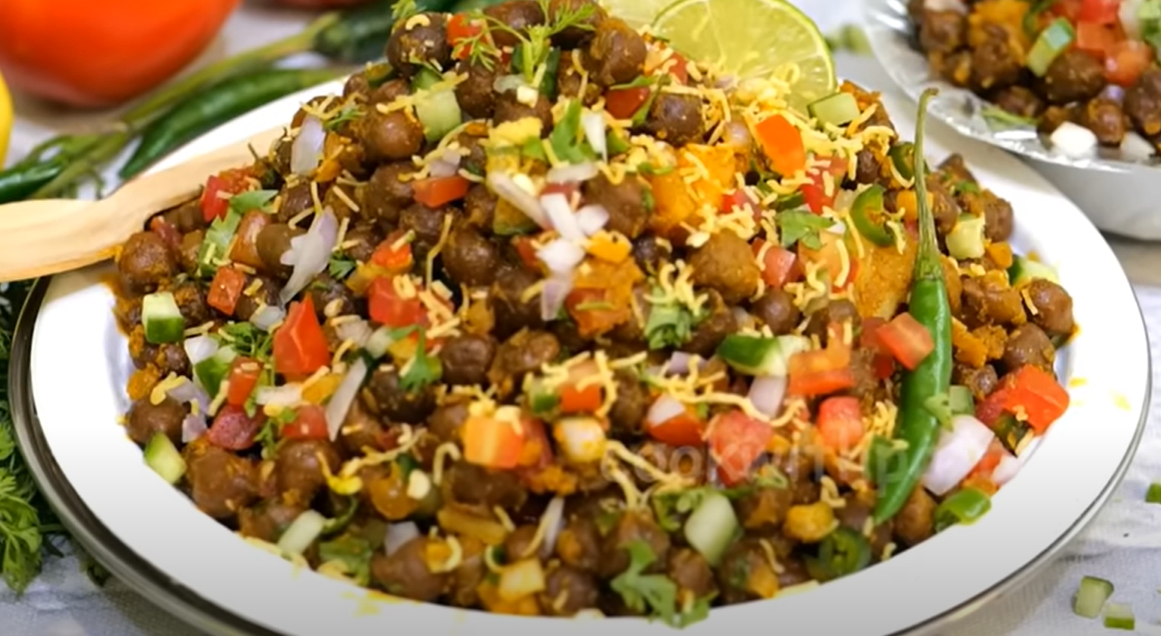
Chana chaat, a delightful South Asian chickpea salad, transcends cultural boundaries with its tangy, sweet, and spicy profile. Whether enjoyed in the bustling streets of Karachi or at intimate gatherings, this scrumptious vegetarian snack has a unique charm that captivates the taste buds. One key ingredient, chaat masala, plays a pivotal role in transforming this dish into a flavorful masterpiece.

Subtitle 2: Unraveling the Mystery of Chaat Masala

Chaat masala, a blend of ground chillies, black salt, and amchur (mango powder), introduces a mouth-puckering sour-savoury note and a distinctive eggy scent to the dish. Widely available in supermarkets, this seasoning has found its way into various culinary delights, from sprinkling over French fries and fruit salads to enhancing the flavor of yogurt dips. The secret behind the versatility of chana chaat lies in the magic of chaat masala.

Subtitle 3: Quick and Easy Chana Chaat Recipe

For those seeking a convenient yet delicious chana chaat experience, a canned chickpea and shop-bought tamarind sauce recipe is the answer. By utilizing these time-saving ingredients, the dish maintains its authenticity without compromising on taste. The inclusion of crunchy fried crackers, or papdi, adds a festival of texture to each mouthful, creating a symphony of flavors.

Subtitle 4: Personalizing Your Chana Chaat Experience

The beauty of chana chaat lies in its adaptability. Toppings can be customized to suit individual preferences, allowing for a personalized culinary adventure. Whether craving an extra kick of heat with more chaat masala and chillies, a creamier texture with a generous dollop of yogurt, or a crunchier experience with additional crispy bits, this recipe is a canvas for culinary creativity.

Title: Chana Chaat Recipe: A Gastronomic Symphony of South Asian Delights

Subtitle 1: Gather Your Ingredients

To embark on this flavorful journey, gather the following ingredients:

  • 2 x 400g canned chickpeas, drained
  • 2 tomatoes, finely chopped
  • 1 red onion, peeled and finely diced
  • 250 g boiled potatoes, chunkily chopped
  • 1 green chilli, chopped
  • 3 tbsp. chaat masala
  • 1/4 tsp. each black salt and sea salt
  • Juice of 1/2 lemon

For the toppings:

  • 4 tbsp. Greek yoghurt
  • 4 tbsp. tamarind sauce
  • 1 green chilli, thinly sliced
  • Chaat masala, for sprinkling
  • 1 tbsp. chopped fresh coriander
  • 40 g sev or papdi

Subtitle 2: Step-by-Step Guide to Chana Chaat Perfection

Step 1: A Flavorful Mix

In a bowl, combine all the ingredients, except the toppings, ensuring every chickpea is coated in the tantalizing blend of salt and spices. This sets the foundation for a mouthwatering chana chaat experience.

Step 2: Serving Sensation

To serve, either present the chana chaat in a communal sharing bowl or divide it into individual servings. Dollop Greek yogurt generously and drizzle the tamarind sauce over the mixture. Top with sliced green chillies, fresh coriander, and a pinch more chaat masala. For the grand finale, pile on the papadi or sev for an added crunch.

Subtitle 3: The Art of Topping Personalization

Chana chaat offers a playground for topping customization. Whether you prefer an explosion of heat, creaminess, or crunch, adjust the toppings accordingly. Let your culinary instincts guide you as you create a chana chaat masterpiece tailored to your taste buds.

In conclusion, the world of chana chaat is a celebration of flavors, textures, and culinary creativity. Whether experienced in the lively streets of Karachi or recreated in the comfort of your kitchen, this South Asian delight promises a gastronomic journey like no other.


Delectable Homemade Burrata with Basil Oil and Zesty Cherries

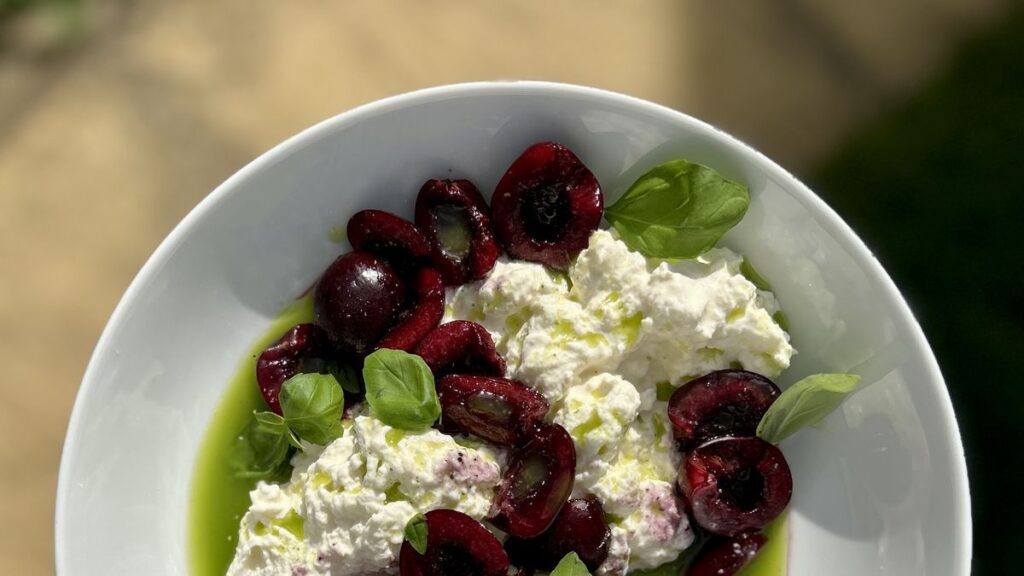
Introduction: Indulging in the creamy delight of burrata is a culinary experience like no other. However, finding the perfect stuffed balls in supermarkets can be a challenge. Fear not, as this recipe presents a cheat’s version of burrata that’s simple yet divine. By tearing mozzarella and blending it with double cream, you can craft your own creamy concoction. The dish is elevated with a quick homemade basil oil and the zing of fresh cherries, making it an ideal starter or a delightful quick snack.


Ingredients:

  • 250 g mozzarella
  • 100 ml double cream
  • 1/2 tsp. salt
  • 10 g basil leaves
  • 200 ml olive oil
  • 100 g cherries, pitted and halved
  • 1/4 tsp. black pepper
  • 1 tbsp. balsamic vinegar

Making the Cheat’s Burrata:

Step 1: Preparing the Mozzarella Mix In a medium bowl, tear the mozzarella into small pieces and generously pour over the double cream. Add 1/4 tsp of salt and stir the ingredients until they meld into a luscious mixture. Cover the bowl and let it refrigerate until you’re ready to serve.

Step 2: Crafting the Basil Oil For the basil oil, immerse the basil leaves in a bowl and cover them with freshly boiled water. Allow them to steep for 10 seconds, then swiftly transfer them into ice-cold water for 2 minutes. Remove and squeeze out any excess liquid. In a food blender, combine the basil leaves with olive oil, blending for 2-3 minutes until the basil is finely processed, and the oil takes on a vibrant green hue. Strain the mixture through a fine sieve, setting the exquisite basil oil aside for later use.

Step 3: Preparing the Zesty Cherries In a small bowl, mix the halved cherries with the remaining salt, black pepper, and a tablespoon of balsamic vinegar. Stir the ingredients until they harmonize, creating a zesty complement to the creamy burrata.


Serving Perfection:

Step 4: Assembling the Dish When you’re ready to serve, spoon generous portions of the homemade burrata onto your preferred dish. Top each mound of creamy delight with the zesty cherry mixture, ensuring a burst of flavor in every bite.

Step 5: Drizzling the Basil Oil Finish the presentation by drizzling the vibrant basil oil over the burrata and cherries. The aromatic infusion of basil elevates the dish, providing a sensory experience that is both visually appealing and palate-pleasing.


Conclusion: In the realm of culinary indulgence, creating a dish that is both accessible and decadent is a triumph. This cheat’s burrata, adorned with homemade basil oil and zesty cherries, stands as a testament to the art of simplicity in gastronomy. Elevate your dining experience with this delightful starter or quick snack, savoring the rich creaminess of mozzarella blended with double cream, the aromatic touch of basil oil, and the zing of fresh cherries. This recipe is not just a meal; it’s a celebration of flavors that resonate with every culinary enthusiast.

Roasted Pumpkin and Paneer Curry Delight

Title: Roasted Pumpkin and Paneer Curry Delight: A Festive Autumn Feast

Introduction

If you’re tired of the same old midweek curry routine, this recipe is here to elevate your culinary experience. Say goodbye to the mundane and welcome a burst of flavors with the Roasted Pumpkin and Paneer Curry. This delightful dish not only tantalizes your taste buds but also presents a visually stunning spectacle, making it perfect for a Friday night feast. With the warmth of autumn infused in every bite, coupled with fluffy basmati rice and a zesty kachumber salad, this recipe promises to bring a little spot of sunshine into your life.

Ingredients

  • 650 g Pumpkin, Deseeded and Wedged
  • 50 ml Vegetable Oil, plus 1 tablespoon
  • 1 tsp. Garam Masala
  • 10 Curry Leaves
  • 5 Green Cardamom Pods, Crushed, and Seeds Reserved
  • 1 Onion, Finely Diced
  • 3 Garlic Cloves, Finely Diced
  • 5 cm piece Ginger, Peeled, and Finely Diced
  • 1 Green Chilli, Finely Sliced (Seeds Removed)
  • 2 tsp. Ground Coriander
  • 1 tsp. Turmeric
  • 1 tsp. Ground Cumin
  • 400 ml Tin Coconut Milk
  • 250 g Paneer, Cut into 2cm Chunks
  • 10 g Fresh Coriander
  • 1 Lime

Kachumber Salad Ingredients

  • 1 Red Onion, Finely Chopped
  • 1/2 Cucumber, Finely Chopped
  • 2 Tomatoes on the Vine, Seeds Removed, and Finely Chopped
  • 10 g Fresh Coriander
  • 1 Lime, Juiced

Directions

Step 1: Roasting the Pumpkin

  • Preheat Oven: Set the oven to 200°C (180°C Fan).
  • Prepare Pumpkin: Place the pumpkin wedges in a large baking dish. Drizzle 1 tablespoon of vegetable oil, add garam masala, and a pinch of salt. Toss to coat.
  • Roast: Roast for 30 minutes until golden and cooked through.

Step 2: Aromatic Base

  • Heat Oil: In a large pan, heat the remaining vegetable oil over medium heat.
  • Infuse Flavors: Add black cardamom seeds and curry leaves to the pan. Fry for 2 minutes.
  • Sauté Aromatics: Add diced onion, garlic, chilli, and ginger. Sauté gently for 8-10 minutes until soft and golden.

Step 3: Flavorful Curry Sauce

  • Spice it Up: Add turmeric, cumin, coriander to the pan. Pour in coconut milk and add paneer chunks.
  • Simmer: Mix well, simmer gently for 10 minutes until the sauce reduces slightly.
  • Season and Citrus Twist: Season to taste and squeeze the juice of 1 lime into the curry.

Step 4: Fresh Kachumber Salad

  • Assemble Salad: While the curry simmers, prepare the kachumber salad by combining chopped onion, cucumber, tomatoes, coriander, and lime juice in a bowl. Add a pinch of salt.

Step 5: Plating the Feast

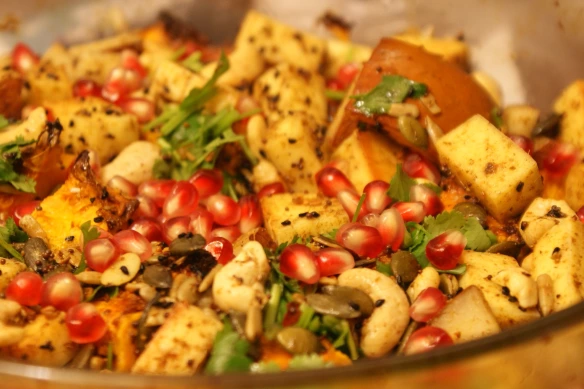
  • Serve: Place the paneer and curry sauce on a bed of fluffy rice. Arrange the roasted pumpkin wedges on top. Garnish with fresh coriander leaves.
  • Sidekick Salad: Serve the kachumber salad on the side for a refreshing contrast.

Tips for Pumpkin Selection

  • Varieties to Look For: Choose pumpkins with pale green waxy skin for the best result. Delica and Crown Prince are excellent options with velvety flesh and skin that softens when roasted, eliminating the need for peeling.
  • Substitute Options: If you can’t find these pumpkin varieties, opt for wedges of butternut squash as an equally delicious alternative.

Conclusion

Indulge in the rich and aromatic flavors of the Roasted Pumpkin and Paneer Curry, a dish that seamlessly blends the earthy sweetness of pumpkin with the creamy goodness of paneer. Elevate your dining experience with the vibrant kachumber salad, adding a burst of freshness to every bite. Perfect for a Friday night feast or a cozy autumn evening, this recipe is sure to become a seasonal favorite, bringing warmth and joy to your table.

Top of Form