Introduction: Indulging in the creamy delight of burrata is a culinary experience like no other. However, finding the perfect stuffed balls in supermarkets can be a challenge. Fear not, as this recipe presents a cheat’s version of burrata that’s simple yet divine. By tearing mozzarella and blending it with double cream, you can craft your own creamy concoction. The dish is elevated with a quick homemade basil oil and the zing of fresh cherries, making it an ideal starter or a delightful quick snack.
Ingredients:
- 250 g mozzarella
- 100 ml double cream
- 1/2 tsp. salt
- 10 g basil leaves
- 200 ml olive oil
- 100 g cherries, pitted and halved
- 1/4 tsp. black pepper
- 1 tbsp. balsamic vinegar
Making the Cheat’s Burrata:
Step 1: Preparing the Mozzarella Mix In a medium bowl, tear the mozzarella into small pieces and generously pour over the double cream. Add 1/4 tsp of salt and stir the ingredients until they meld into a luscious mixture. Cover the bowl and let it refrigerate until you’re ready to serve.
Step 2: Crafting the Basil Oil For the basil oil, immerse the basil leaves in a bowl and cover them with freshly boiled water. Allow them to steep for 10 seconds, then swiftly transfer them into ice-cold water for 2 minutes. Remove and squeeze out any excess liquid. In a food blender, combine the basil leaves with olive oil, blending for 2-3 minutes until the basil is finely processed, and the oil takes on a vibrant green hue. Strain the mixture through a fine sieve, setting the exquisite basil oil aside for later use.
Step 3: Preparing the Zesty Cherries In a small bowl, mix the halved cherries with the remaining salt, black pepper, and a tablespoon of balsamic vinegar. Stir the ingredients until they harmonize, creating a zesty complement to the creamy burrata.
Serving Perfection:
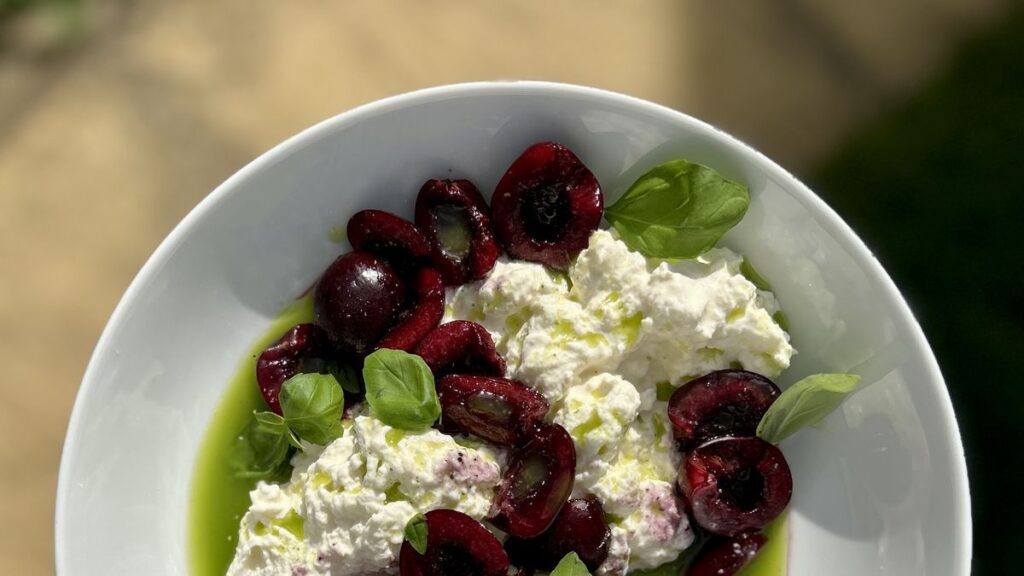
Step 4: Assembling the Dish When you’re ready to serve, spoon generous portions of the homemade burrata onto your preferred dish. Top each mound of creamy delight with the zesty cherry mixture, ensuring a burst of flavor in every bite.
Step 5: Drizzling the Basil Oil Finish the presentation by drizzling the vibrant basil oil over the burrata and cherries. The aromatic infusion of basil elevates the dish, providing a sensory experience that is both visually appealing and palate-pleasing.
Conclusion: In the realm of culinary indulgence, creating a dish that is both accessible and decadent is a triumph. This cheat’s burrata, adorned with homemade basil oil and zesty cherries, stands as a testament to the art of simplicity in gastronomy. Elevate your dining experience with this delightful starter or quick snack, savoring the rich creaminess of mozzarella blended with double cream, the aromatic touch of basil oil, and the zing of fresh cherries. This recipe is not just a meal; it’s a celebration of flavors that resonate with every culinary enthusiast.