A Guide to Making the Perfect Gluten-Free Yorkshire Pudding

Introduction Perfect Gluten-Free Yorkshire Pudding

Yorkshire pudding is a quintessential British side dish, traditionally served with roast beef and gravy. Its light, airy texture and golden-brown crust make it a favorite among many. However, if you follow a gluten-free diet, you might think this delightful dish is off-limits. Fear not! With a few tweaks and substitutions, you can enjoy delicious gluten-free Yorkshire puddings that rival the traditional version.

Understanding Yorkshire Pudding

Before diving into the gluten-free recipe, let’s explore what makes Yorkshire pudding so special. This classic dish is made from a simple batter of flour, eggs, and milk. The secret to its light and fluffy texture lies in the high heat used during baking, which causes the batter to rise and form a crisp exterior while remaining soft inside.

The Challenge of Gluten-Free Baking

Gluten is a protein found in wheat, barley, and rye. It gives dough its elasticity and helps it rise and maintain its shape. When baking without gluten, finding the right flour substitute is crucial to achieve a similar texture and taste. Thankfully, there are many gluten-free flour blends available that can mimic the properties of wheat flour.

Ingredients for Gluten-Free Yorkshire Pudding

To make gluten-free Yorkshire puddings, you will need the following ingredients:

  • 100g gluten-free plain flour (a blend that includes rice flour, potato starch, and tapioca flour works well)
  • 3 large eggs
  • 150ml milk (you can use dairy or a non-dairy alternative such as almond, soy, or oat milk)
  • 50ml water
  • A pinch of salt
  • 2 tablespoons vegetable oil or beef drippings

Step-by-Step Recipe

1. Preheat the Oven

Start by preheating your oven to 220°C (425°F) or 200°C (400°F) for fan ovens. It’s essential to have the oven at the right temperature to achieve the best rise for your puddings.

2. Prepare the Batter

In a mixing bowl, combine the gluten-free flour and a pinch of salt. Make a well in the center of the flour and add the eggs. Gradually whisk in the milk and water until you have a smooth batter. The consistency should be similar to heavy cream. Let the batter rest for at least 15 minutes. This resting period allows the flour to hydrate properly, which is crucial for achieving the right texture.

3. Heat the Oil

Place a small amount of vegetable oil or beef drippings in each compartment of a muffin tin (or a Yorkshire pudding tray if you have one). Place the tin in the preheated oven for about 10 minutes until the oil is very hot and starting to smoke. This step is essential as the hot oil will help the batter rise quickly, creating the characteristic puffiness of Yorkshire puddings.

4. Cook the Puddings

Carefully remove the hot tin from the oven. Quickly pour the batter into the hot oil, filling each compartment about halfway. Immediately return the tin to the oven and bake for 20-25 minutes without opening the oven door. Opening the door can cause the puddings to deflate. Bake until the puddings are puffed up and golden brown.

5. Serve

Remove the Yorkshire puddings from the tin and serve immediately. They are best enjoyed fresh from the oven, crisp on the outside and soft on the inside.

Tips for Perfect Gluten-Free Yorkshire Puddings

  1. Choose the Right Flour: Not all gluten-free flours are created equal. A blend specifically designed for baking will give you the best results. Look for a mix that includes rice flour, potato starch, and tapioca flour.
  2. Rest the Batter: Allowing the batter to rest before baking is crucial. This step helps the flour absorb the liquid fully, resulting in a smoother and more consistent batter.
  3. Use Hot Oil: The oil needs to be very hot to create the initial rise. Heating the oil in the oven before adding the batter ensures the perfect puff.
  4. Don’t Open the Oven Door: It might be tempting to check on your puddings, but opening the oven door can cause them to collapse. Be patient and wait until they are fully cooked.
  5. Serve Immediately: Yorkshire puddings are best served straight from the oven. They tend to lose their crispness if left to sit.

Variations and Serving Suggestions

While Yorkshire puddings are traditionally served with roast beef, they are versatile and can accompany various dishes. Here are a few ideas to get you started:

  1. Mini Yorkshire Puddings with Smoked Salmon and Cream Cheese: Fill mini puddings with a dollop of cream cheese and a slice of smoked salmon for an elegant appetizer.
  2. Yorkshire Pudding Wraps: Use large puddings as a wrap for roast beef, horseradish sauce, and fresh greens. It’s a unique and delicious way to enjoy a sandwich.
  3. Vegetarian Option: Serve your Yorkshire puddings with a rich mushroom and onion gravy for a satisfying vegetarian meal.
  4. Sweet Yorkshire Puddings: For a twist, try making sweet Yorkshire puddings by adding a bit of sugar to the batter. Serve with fresh berries and whipped cream for a delightful dessert.

Conclusion

Making gluten-free Yorkshire puddings might seem daunting, but with the right ingredients and techniques, it’s entirely possible to achieve delicious results. By following this recipe and incorporating the tips provided, you’ll be able to enjoy this classic British dish without compromising on taste or texture. Whether you serve them with a traditional roast or get creative with fillings and toppings, gluten-free Yorkshire puddings are sure to be a hit at your table. Happy baking!

Quick And Easy Mince Pies preparation

Ingredients:

For the Pastry:

  • 225g (8 oz) plain flour
  • 100g (4 oz) cold butter, diced
  • 25g (1 oz) caster sugar
  • 1 egg yolk
  • 2-3 tbsp cold water

For the Filling:

  • 350g (12 oz) ready-made mincemeat

Optional:

  • Icing sugar for dusting

Instructions:

  1. Preheat the Oven: Preheat your oven to 200°C (400°F) or 180°C (350°F) for a fan oven, or gas mark 6.
  2. Make the Pastry:
    • Put the flour and butter in a bowl and rub together with your fingertips until the mixture resembles fine breadcrumbs.
    • Stir in the caster sugar.
    • Add the egg yolk and mix in enough cold water to bring the dough together. Start with 2 tablespoons and add more if needed.
    • Gather the dough into a ball, wrap in cling film, and chill in the fridge for 10-15 minutes.
  3. Prepare the Mince Pies:
    • Roll out the pastry on a lightly floured surface to about 3mm thick.
    • Using a round cutter (approximately 7.5cm/3in), cut out 12 bases and place them into a 12-hole tart tin.
    • Put a heaped teaspoon of mincemeat into each pastry case.
    • Re-roll the remaining pastry and cut out 12 lids using a smaller cutter (approximately 6cm/2.5in).
    • Place the lids on top of the mincemeat and press the edges together to seal. You can use a little water to help the lids stick if needed.
    • Cut a small slit in the top of each pie to allow steam to escape.
  4. Bake the Mince Pies:
    • Bake in the preheated oven for 20-25 minutes until the pastry is golden brown.
    • Remove from the oven and allow to cool slightly in the tin before transferring to a wire rack to cool completely.
  5. Serve:
    • Dust with icing sugar before serving for a festive touch.

Enjoy your delicious and easy-to-make mince pies and keep visiting here and for more wiki mince pie

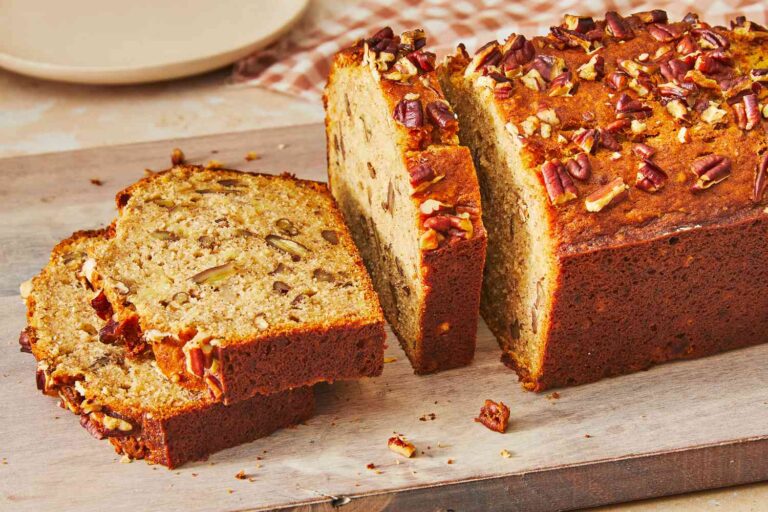
Banana Bread with Caramel, Dark Chocolate, and Banana Chips

Ingredients:

  • 150 g plain flour
  • 1/2 tsp. baking powder
  • 1/2 tsp. bicarbonate of soda
  • 40 g walnuts, roughly chopped
  • 70 g butter, melted
  • 120 g caster sugar
  • 1 egg
  • 40 g plain yoghurt
  • 1 tsp. vanilla extract
  • 1 ripe banana, mashed
  • 100 g milk chocolate, roughly chopped
  • 100 g dark chocolate, roughly chopped
  • A pinch of sea salt
  • 120 g butter
  • 20 g banana chips

For the Caramel:

  • 120 g butter
  • 150 g light brown sugar
  • 397 g condensed milk

Directions:

  1. Preheat Oven:
    • Preheat the oven to 190°C (170°C Fan). Grease and line a 2lb loaf tin.
  1. Prepare Dry Ingredients:
    • In a large bowl, combine flour, baking powder, bicarbonate of soda, and walnuts. Set aside.
  1. Prepare Wet Ingredients:
    • In another large bowl, mix melted butter, caster sugar, egg, yoghurt, and mashed banana.
  1. Combine Ingredients:
    • Add wet ingredients into the bowl with dry ingredients. Stir until well combined.
  1. Bake:
    • Pour the batter into the prepared loaf tin and bake for 25-30 minutes or until a skewer comes out clean.
  1. Make Caramel:
    • In a saucepan over medium heat, combine butter and light brown sugar. Once melted, simmer for 4-5 minutes, then add condensed milk. Stir and bring to a boil. Simmer for an additional 5 minutes until slightly thickened.
  1. Top with Caramel:
    • Spread the caramel over the baked banana bread, ensuring an even layer. Allow it to cool.
  1. Prepare Chocolate Topping:
    • In a large bowl, melt milk chocolate, dark chocolate, and butter in increments of 30 seconds. Let it cool for 5 minutes.
  1. Top with Chocolate:
    • Pour the melted chocolate over the caramel and spread it evenly.
  1. Final Touch:
    • Finish with a sprinkle of sea salt and banana chips.
  1. Chill and Serve:
    • Refrigerate until the chocolate has set. Slice and enjoy this decadent banana bread!

This recipe seems perfect for a special occasion or as a delightful treat. Happy baking!

Heavenly Mini Pancake Bites with Maple Bourbon Glaze

Introduction

Are you ready to elevate your party game with a show-stopping canapé that combines the sweetness of mini pancakes, the savory crunch of pancetta, and the tantalizing flavor of a maple bourbon glaze? These mini pancake bites are not only delicious but also easy to make. Whether you’re hosting a fancy cocktail party or a casual get-together, this recipe is sure to impress your guests. Let’s delve into the details, from the ingredients to the step-by-step directions, ensuring your next party is a memorable culinary experience.

Maple Bourbon Glaze
Maple Bourbon Glaze

Ingredients That Make the Magic

Before we dive into the cooking process, let’s take a closer look at the carefully selected ingredients that come together to create these delectable mini pancake bites.

Ingredients:

  • 200 ml maple syrup
  • 30 ml bourbon (optional)
  • Pinch of chili flakes
  • 100 g self-raising flour
  • 1 tbsp. caster sugar
  • 1 large egg
  • 100 ml buttermilk
  • 100 ml semi-skimmed milk
  • 20 g melted butter, plus extra for frying
  • 8 slices of pancetta, each cut into quarters

Creating the Maple Bourbon Glaze

Step 1: Simmering Elegance

In a small saucepan over medium-low heat, combine the maple syrup, bourbon (if using), and a pinch of chili flakes. Allow the mixture to simmer for approximately 10 minutes until it reduces by half, creating a luscious, foamy glaze. Set the pan aside to cool for 15 minutes, allowing the flavors to meld.

Preparing the Pancake Batter

Step 2: Batter Bliss

In a large bowl, whisk together the self-raising flour, caster sugar, egg, buttermilk, and semi-skimmed milk until a smooth batter forms. Add a pinch of salt and the melted butter, stirring until all ingredients are well incorporated.

Step 3: Bottling Up the Goodness

Transfer the pancake batter into a plastic squeezy bottle or a clean recycled sauce bottle, providing an easy and precise way to dispense the batter. Allow the mixture to rest for 5 minutes, allowing the flavors to deepen.

Cooking the Mini Pancakes

Step 4: Pancake Perfection

Heat a large non-stick frying pan over medium heat. Using kitchen roll, lightly coat the pan with extra butter. Now, create perfect £2-coin sized blobs of batter, cooking them for 1-2 minutes until bubbles appear on the surface. Swiftly flip the mini pancakes and cook for an additional minute. Repeat until all batter has been used, placing the mini pancakes on a plate lined with kitchen roll to absorb any excess butter.

Step 5: Crisping Up the Pancetta

In the same frying pan, turned up to high heat, cook the pancetta quarters until they achieve a crispy, golden brown perfection.

Assembling the Divine Canapés

Step 6: Stack and Drizzle

To assemble the canapés, stack 3 or 4 mini pancakes with a piece of the crisped pancetta on top. Secure the stacks with cocktail sticks and repeat the process until all mini pancakes are stacked. Just before serving, drizzle the sticky maple glaze over each stack, ensuring a decadent and sweet finish.

Bonus Tip: Parma Ham Option

Can’t find pancetta? No problem! Substitute it with Parma ham, dry-frying until it reaches a delightful ‘frazzled’ texture. This alternative brings a unique twist to the dish, catering to different preferences.

Conclusion

These mini pancake bites with maple bourbon glaze are a delightful fusion of sweet and savory, making them the perfect canapé for your next celebration. With easy-to-follow steps and readily available ingredients, you can effortlessly impress your guests with this sophisticated treat. Elevate your entertaining skills and add a touch of culinary flair to your gatherings by serving up these heavenly mini pancake bites. Your guests will undoubtedly be left craving more, making your party the talk of the town.

Savory Corned Beef and Vegetable Pie Recipe

Introduction: Indulge your taste buds in a hearty and flavorful meal with this delightful Savory Corned Beef and Vegetable Pie. Packed with wholesome ingredients and a golden, flaky crust, this recipe is a perfect blend of comfort and culinary satisfaction. In this detailed guide, we’ll walk you through each step, offering tips and insights to ensure your pie turns out perfect every time.

 Pie Recipe
Pie Recipe


I. Ingredients: A Symphony of Flavors

  1. Vegetable Oil Elegance:
    • 1 tbsp vegetable oil sets the stage for a rich and savory base.
  2. Mirepoix Magic:
    • 1 large onion, chopped
    • 2 carrots, chopped
    • 1 potato, diced
  3. Corned Beef Brilliance:
    • 340g can of corned beef, cut into large, succulent pieces.
  4. Worcestershire Wizardry:
    • 1 tsp Worcestershire sauce for a depth of umami.
  5. Beefy Embrace:
    • 300ml warm beef stock adds a comforting touch.
  6. Flaky Elegance:
    • 320g ready-rolled shortcrust pastry sheet.
  7. Milk’s Golden Touch:
    • 1 tbsp milk for that perfect golden sheen.
  8. Sidekick Greens:
    • Buttered kale, to serve, adding a nutritious and flavorful companion.

II. The Artful Method: Crafting Culinary Masterpiece Vegetable Pie Recipe

STEP 1: Sautéing Symphony Vegetable Pie Recipe

  • Heat the oil in a large frying pan over a medium heat.
  • Sautee onions and carrots for 5 mins, adding a colorful and aromatic base.
  • Introduce diced potatoes, cooking for an additional 5 mins, enhancing texture and flavor.

STEP 2: Corned Beef Ballet

  • Gently stir in the corned beef, allowing it to dance with the veggies for 2-3 mins until it starts to gain a beautiful color.
  • Infuse the Worcestershire sauce, warm beef stock, and a pinch of seasoning, simmering for 5 mins until the potato achieves the desired tenderness.

STEP 3: Preparing the Stage

  • Preheat the oven to 200C/180C fan/gas 6.
  • Transfer the harmonious filling to a pie dish or small ovenproof dish, setting the stage for the upcoming pastry spectacle.
  • If needed, gently roll the pastry to size, ensuring it generously covers the top with a touch of excess.

STEP 4: The Grand Finale

  • Dampen the dish edges with water, inviting the pastry to join the performance.
  • Use a fork to press the pastry firmly onto the edge, creating a seamless connection.
  • Make a small slash in the middle, allowing the steam to gracefully escape, and trim any excess pastry with precision.

STEP 5: Baking Symphony

  • Place the pie on a baking tray, presenting it to the oven’s warm embrace.
  • Brush the pastry with milk, setting the stage for a golden brown crescendo.
  • Bake for 30-35 mins until the pie achieves a perfect harmony of colors and textures.

III. Presentation: A Feast for the Senses

The final act is as important as the preparation. Present your Savory Corned Beef and Vegetable Pie with artistic flair, perhaps accompanied by a sprinkle of fresh herbs or a drizzle of gravy. The golden crust should crunch with a symphony of textures, and the rich, savory aroma will tantalize your senses.


Conclusion: A Culinary Masterpiece on Your Plate

This Savory Corned Beef and Vegetable Pie recipe is not just a meal; it’s a culinary masterpiece. From the careful selection of ingredients to the meticulous crafting of each step, this dish is a celebration of flavors and textures. Whether you’re serving it for a family dinner or impressing guests, this recipe promises to deliver a satisfying experience that lingers on the palate and in the memory.