The Art of Perfect Custard: A Comprehensive Guide

Introduction

Imagine the luscious aroma of vanilla-scented custard cascading over a delightful serving of apple crumble, sticky toffee pudding, or jam sponge. The allure of this classic dessert companion is undeniable. In this comprehensive guide, we’ll delve into the world of custard-making, exploring its traditional roots, troubleshooting common issues, and discovering creative ways to elevate this timeless treat.

Unveiling the Basics of Traditional Custard

  1. The Foundation: Ingredients and Process

Traditional custard is a harmonious blend of milk, eggs, sugar, and a hint of vanilla flavor. The basic recipe serves as a canvas that can be tailored to personal preferences. As you master the fundamentals, you’ll unlock the ability to adjust thickness, richness, and even infuse chocolatey notes with a touch of cocoa powder.

  1. The Cornflour Conundrum

The classic crème anglaise, or pouring custard, relies solely on eggs for thickening. However, the addition of a dash of cornflour introduces a layer of foolproof security. It prevents the eggs from overcooking, resulting in a smoother, thicker custard.

  1. Vanilla Variety: Pod vs. Extract

For those without a vanilla pod, fear not. Vanilla extract can seamlessly substitute. Discover the art of incorporating the extract at the custard’s final stages for an equally enchanting flavor.

  1. Enhancing Richness: Yolks and Cream

Unearth the secrets to crafting a decadent custard by increasing the egg yolk quantity or substituting whole milk with double cream. This adjustment not only enriches the custard but also transforms its texture into a delectable baked custard consistency.

Troubleshooting Custard Quandaries

  1. Whisking Woes: Lumps and Texture

To avoid lumps, maintain a continuous whisking motion while introducing milk. Alternatively, add milk gradually, a ladle at a time. When returning the custard to the pan, low heat is key to preventing clumping and sticking.

  1. The Perils of Scrambling: Temperature Matters

Custard may turn grainy and scrambled if the milk is too hot. Allow it to cool slightly before slowly incorporating it into the eggs, preventing undesirable cooking on contact.

  1. Battling the Dreaded Skin

Preserve the custard’s velvety texture by placing clingfilm directly on top, creating a protective barrier against air exposure.

  1. Straining for Perfection

While straining isn’t mandatory, it can be the secret to achieving an impeccably smooth finish. Pass the custard through a sieve if a grainy appearance troubles your culinary masterpiece.

Beyond the Basics: Creative Custard Adventures

  1. Churning Delights: Custard Ice Cream

Explore the realm of frozen treats by churning custard in an ice cream machine. The result? A heavenly topping for pavlovas or a stand-alone indulgence.

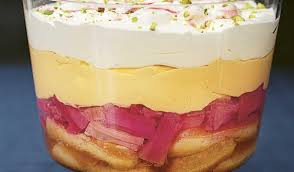
  1. Trifles and Puddings: Custard Extravaganza

Immerse custard in the world of trifles or elevate bread and butter pudding by soaking slices of brioche before baking. Transform your custard into a lavish crème brulee by skipping the final saucepan stage and caramelizing under a hot grill.

The Perfect Custard Recipe

Ingredients:

  • 600 ml milk
  • 1 vanilla pod (or ½ tsp vanilla extract), cut down the middle and seeds scraped out
  • 4 egg yolks
  • 2 tbsp. caster sugar (about 30g)
  • 2 tsp. cornflour

Directions:

  1. In a saucepan over medium heat, bring milk, vanilla seeds, and pod to a boil.
  2. Whisk together egg yolks, sugar, and cornflour in a bowl. Remove boiled milk from heat, let it cool, and remove the vanilla pod.
  3. Gradually pour the milk into the egg mixture, whisking continuously.
  4. Return the mixture to the pan over low heat, stirring gently until thickened to coat the back of a wooden spoon.

TOP TIP: Don’t discard the vanilla pod; rinse and add it to a jar of sugar for delightful vanilla sugar!

In conclusion, custard-making is an art form that combines tradition with creativity. Mastering the basics and troubleshooting common issues opens the door to a world of culinary possibilities, from frozen delights to elegant desserts. So, embark on your custard journey, and let your kitchen be filled with the enchanting aroma of this dreamy, velvety creation.


The Art of Crafting a Decadent Homemade Trifle

Homemade Trifle

The Art of Crafting a Decadent Homemade Trifle: A Journey Through Layers of Delight

Introduction: The Evolution of Trifle-Making

As a teenager, my trifle-making journey began with boxed trifle kits—a simple mix of custard, cream topping, and a packet of chocolate sprinkles. Over time, I’ve discovered that crafting a proper homemade trifle involves a bit more effort, but each stage is a delightful and achievable experience. Let’s explore the intricate layers that make up the perfect trifle.

Section 1: Deconstructing the Trifle

1.1 Understanding the Components

A trifle is a symphony of textures and flavors, consisting of syrup-soaked cake, juicily-ripe fruit, wobbly jelly, vanilla-scented custard, and dollops of whipped cream. Each component plays a crucial role in creating a harmonious dessert experience.

1.2 The Foundation: Sponge Fingers and Alternatives

The bottom layer of a trifle is typically made with sponge fingers or ladyfinger biscuits. These are often sandwiched together with jam and soaked in liqueur or fruit juice. Explore alternatives like Madeira cake, panettone, brioche, or slices of Swiss roll for unique variations in texture and taste.

Section 2: Fruitful Choices in Trifle-Making

2.1 The Fruit Medley

While summer fruits like strawberries and raspberries are traditional choices, the beauty of trifle lies in its versatility. Embrace creativity with fresh mango, blueberries, mandarin, pineapple, or passion fruit, either strewn over the sponge or used as a decorative topping for the final layer of cream.

2.2 Jelly or Not?

While not every trifle includes jelly, it adds a classic wobbly texture to the dessert. Learn the art of making your own jelly using gelatine leaves and fruit syrup or opt for ready-made jelly crystals. Pour it over the sponge base and witness the distinctive layers coming to life in a transparent trifle bowl.

Section 3: Custard – The Heart of the Trifle

3.1 The Perfect Custard

Powdered custard is ideal for trifles due to its thick texture that sets firmly. For a homemade touch, combine caster sugar, egg yolks, and cornflour, whisking them into a pan of vanilla-infused hot milk. Achieve a substantial consistency closer to crème patisserie, ensuring it forms a stable base for the layers above.

3.2 Custard Application and Cooling Techniques

After preparing the custard, spread it generously over the jelly and sponge finger layer. To prevent a skin from forming, cover the surface with cling film and chill it, allowing the custard to set and provide a luscious foundation for the trifle.

Section 4: Whipped Cream – The Fluffy Clouds on Top

4.1 Sweetening the Cream

The whipped cream is a crowning glory, sweetened with a touch of icing sugar. Whip it until it reaches the soft peak stage, creating a light and airy texture that complements the richness of the trifle.

4.2 Piling it High

Abundance is key when it comes to whipped cream. Pile it high on top of the set custard, allowing it to peek over the serving bowl’s edge, or consider piping it for a more sophisticated finish.

Section 5: Sprinkles and Toppings – Adding the Finishing Touch

5.1 Endless Possibilities

From shavings of milk chocolate and fresh raspberries to sour cherries, candied peel, crushed biscuits, and flaked almonds, the topping possibilities for your trifle are limitless. Explore different combinations to find your unique flavor profile.

5.2 The All-Time Favorite: Birthday Cake Sprinkles

In the realm of trifle toppings, multicolored birthday cake sprinkles hold a special place. Learn how to incorporate them into your trifle for a playful and visually appealing finish.

Conclusion: Crafting Your Masterpiece

In the art of trifle-making, every layer contributes to a decadent symphony of flavors and textures. From the foundation of sponge fingers to the airy whipped cream clouds on top, each step is a joyful endeavor. Embrace the creative freedom trifle-making offers, and soon, you’ll be crafting your own masterpiece—one layer at a time.