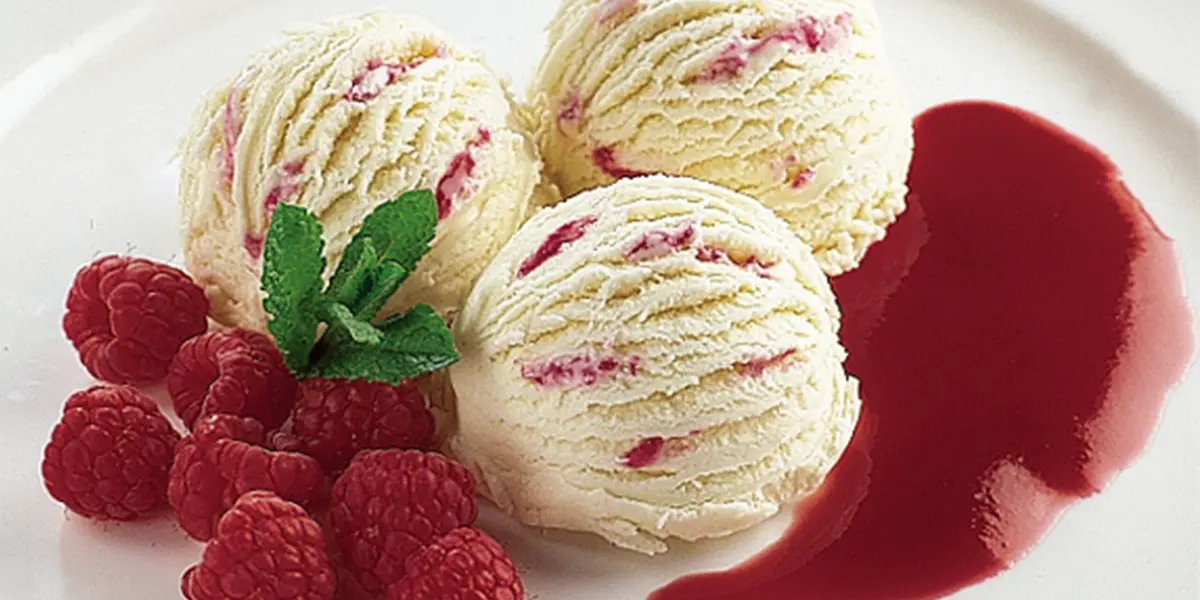
The Magic of Raspberry Ripple Ice Cream
Few desserts capture the spirit of summer like raspberry ripple ice cream. With its striking pink swirls of tart raspberry sauce folded into creamy vanilla ice cream, this treat is as beautiful as it is delicious. It’s a nostalgic flavor that reminds many of childhood, ice cream vans, and sunny afternoons.
Whether you’re hosting a garden party, craving a homemade dessert, or looking for a new twist on classic ice cream, raspberry ripple ice cream is the perfect choice. And the best part? You can easily make it at home with just a handful of ingredients and a few simple steps.
In this post, we’ll walk you through everything you need to know — from making the perfect raspberry ripple to creating smooth, scoopable ice cream that rivals any store-bought version.
Why You’ll Love Raspberry Ripple Ice Cream
- 🍓 Bursting with flavor: The combination of sweet, creamy vanilla ice cream and tangy raspberries is irresistible.
- ❄️ No fancy equipment needed: You can make this recipe with or without an ice cream maker.
- 💗 Beautiful presentation: The pink and white swirls make it perfect for parties, romantic desserts, or Instagram-worthy photos.
- 🌿 All-natural ingredients: Skip the artificial colors and flavors — fresh raspberries give this ice cream its natural color and taste.
Ingredients You’ll Need
To make homemade raspberry ripple ice cream, you’ll need:
For the Raspberry Ripple:
- 1 ½ cups fresh or frozen raspberries
- ¼ cup granulated sugar
- 1 teaspoon lemon juice
For the Ice Cream Base:
- 2 cups heavy cream
- 1 cup whole milk
- ¾ cup granulated sugar
- 1 tablespoon vanilla extract
- Pinch of salt
Optional: 4 egg yolks (for a custard-style ice cream)
Step-by-Step Recipe
Step 1: Make the Raspberry Ripple
In a small saucepan, combine raspberries, sugar, and lemon juice. Cook over medium heat for 5–7 minutes, stirring occasionally, until the raspberries break down and the mixture thickens slightly.
Remove from heat and strain through a fine mesh sieve to remove the seeds. Let the raspberry sauce cool completely before using. This will be your gorgeous ripple layer!
Step 2: Make the Ice Cream Base
No-Churn Version:
In a large mixing bowl, whisk together the cream, milk, sugar, vanilla, and salt until the sugar is dissolved. Chill the mixture for about 30 minutes before freezing.
Custard-Style Version:
If you prefer a richer, smoother texture, use egg yolks. Heat the milk and half the sugar in a saucepan until steaming. In a separate bowl, whisk egg yolks with the remaining sugar, then slowly pour in the hot milk while whisking. Return the mixture to the heat and stir until slightly thickened. Remove from heat, cool, and add the cream, vanilla, and salt.
Step 3: Freeze the Ice Cream
If using an ice cream maker, churn according to the manufacturer’s instructions until it reaches a soft-serve consistency.
If you don’t have an ice cream maker, pour the mixture into a freezer-safe container and freeze for one hour. Then, stir vigorously every 30 minutes for about 3 hours to break up ice crystals.
Step 4: Add the Raspberry Ripple
Once your ice cream base is ready, spoon half of it into a loaf pan or freezer container. Drizzle half of the raspberry sauce on top and gently swirl it with a knife. Add the remaining ice cream and repeat with the remaining sauce.
Cover the container and freeze for at least 4–6 hours, or overnight for best results.
Tips for the Perfect Raspberry Ripple Ice Cream
- Use fresh raspberries when in season — they deliver the best flavor and color.
- Don’t over-swirl the sauce; you want visible streaks rather than a fully mixed pink ice cream.
- Chill all ingredients before freezing to ensure a creamy texture.
- Add texture: Try folding in crushed meringue, white chocolate chunks, or shortbread pieces for a twist.
- Serve it right: Let the ice cream sit at room temperature for 5 minutes before scooping for the perfect consistency.
For in-depth freezing tips, check out David Lebovitz’s ice cream FAQ, a trusted source among home ice cream makers worldwide.
Creative Variations to Try
- Raspberry Ripple Cheesecake Ice Cream: Add small chunks of cheesecake or a swirl of cream cheese frosting.
- Vegan Raspberry Ripple Ice Cream: Use coconut cream and plant-based milk instead of dairy.
- Raspberry & Chocolate Ripple: Layer raspberry sauce with a drizzle of chocolate fudge for a decadent treat.
- Raspberry Ripple Popsicles: Pour the mixture into popsicle molds for portable, no-mess desserts.
How to Store Homemade Ice Cream
Store your raspberry ripple ice cream in an airtight container in the freezer for up to two weeks. To prevent ice crystals, press a piece of parchment paper directly onto the surface before sealing the lid.
For more storage and freezing tips, read this guide from Taste of Home.
Final Thoughts
Homemade raspberry ripple ice cream is a timeless dessert that’s as satisfying to make as it is to eat. Its creamy texture, tangy-sweet flavor, and eye-catching swirls make it the perfect summer indulgence. Whether served in a cone, a bowl, or alongside a slice of cake, this treat is guaranteed to impress family and friends.
So grab those raspberries and a spoon — your next scoop of happiness is just a few swirls away!