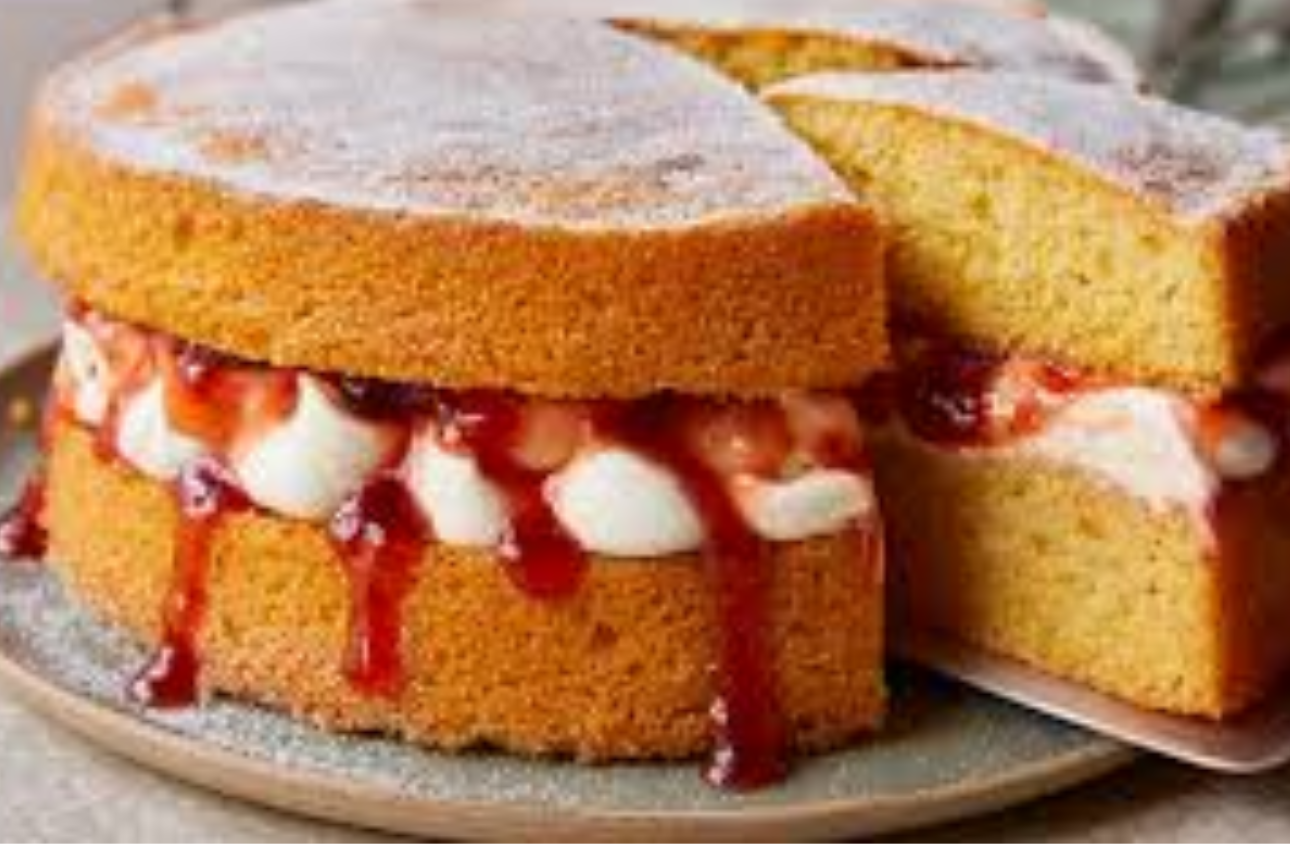
Mary Berry Classic Victoria Sponge is one of the most iconic British cakes—simple, elegant, and perfect for any home baker looking to master a timeless classic. This guide breaks down Mary Berry’s signature method, providing clear steps, practical tips, and pro-level upgrades so you can achieve a perfectly light, fluffy sponge every time. Whether you’re … Read more
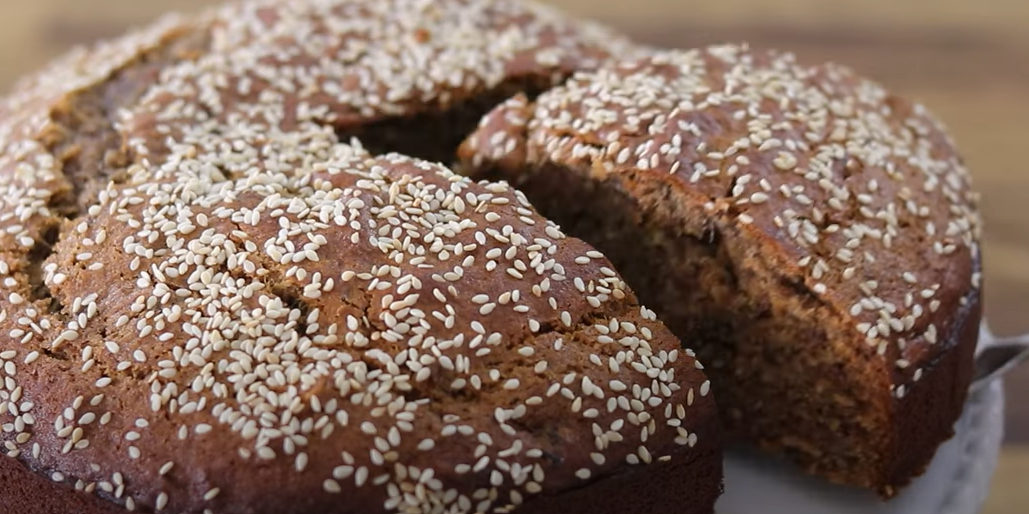
Certainly! A Blackberry and Tahini Cake is a delightful combination that brings together the fruity sweetness of blackberries and the rich, nutty flavor of tahini.
Here’s a simple recipe for you to try:
Ingredients:
For the Cake:
225g butter
125g light brown sugar
100g caster sugar
3 large eggs
80g tahini
250g self-raising flour
1 tsp. ground cinnamon
1 tsp. ground ginger
200g blackberries, plus extra to decorate
For the Icing:
150g butter, softened
400g icing sugar
3 tbsp. tahini
150g blackberry jam
Directions:
Preheat and Prepare:
Preheat the oven to 190°C (170°C Fan).
Grease and line a 20cm round cake tin.
Cream Butter and Sugar:
In a large mixing bowl, beat butter and light brown sugar until pale and fluffy.
Add Eggs and Tahini:
Add eggs one at a time, mixing well.
Stir in tahini until combined.
Prepare Dry Ingredients:
In another bowl, sieve together self-raising flour, cinnamon, and ginger.
Add 200g blackberries, stir to coat in flour.
Combine Wet and Dry Ingredients:
Add the dry ingredients to the wet mixture. Stir until just combined, avoiding over-mixing.
Bake for 45 minutes or until cooked through and golden. Allow to cool and then remove from the tin.
Prepare Icing:
In a bowl, beat together softened butter, icing sugar, and tahini until light and fluffy.
Assemble:
Using a wooden spoon, poke 16 holes into the cake.
Spread blackberry jam over the cake, ensuring it goes into the holes.
Spread the tahini icing over the cake.
Final Touch:
Decorate with remaining blackberries.
This flavorsome blackberry cake with tahini is now ready to be enjoyed as a show-stopping dessert!
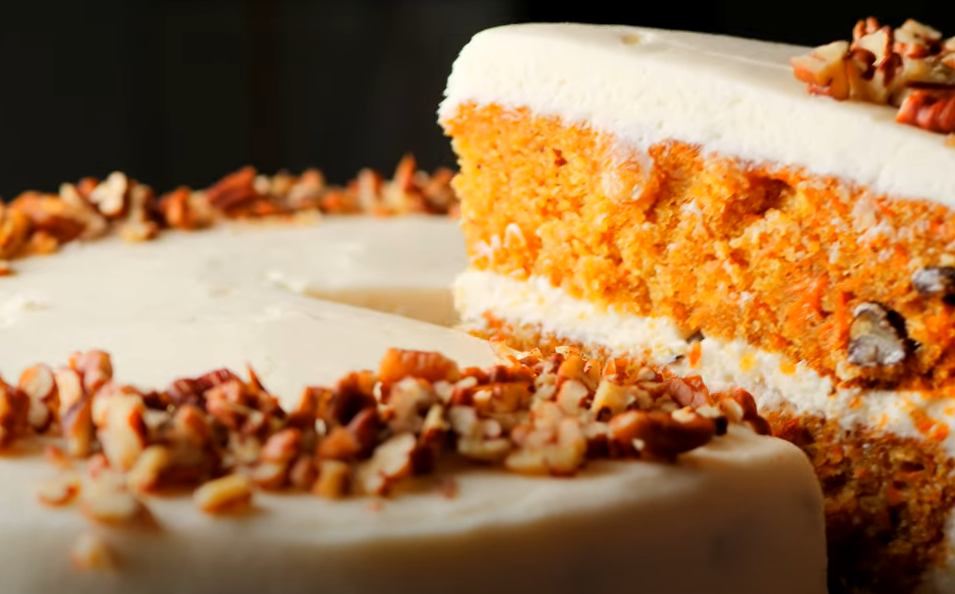
Embracing the spirit of spring, the carrot cake traybake emerges as a favorite among bakers seeking a delightful, seasonal treat. This unique recipe not only features the customary warming spices and orange zest but also introduces a twist with a ricotta frosting that adds a deliciously light and tangy dimension to the classic cream cheese topping. Unconventional yet harmonious, the addition of thyme provides a subtle herbal undertone, creating a cake that is not only visually appealing but also a symphony of flavors.
Ingredients for Carrot Cake
The Foundation of Flavor
The first step towards crafting this delectable carrot cake involves gathering a set of quality ingredients. The combination of these elements plays a crucial role in achieving the perfect balance of sweetness, spiciness, and herbal notes. Here’s what you’ll need:
Soft butter for greasing
200 g plain flour
1 tsp. bicarbonate of soda
1 tsp. baking powder
200 g soft light brown sugar
2 tsp. ground cinnamon
1 mixed spice
1/4 tsp. ground cloves
Zest of 1 orange
200 g peeled and coarsely grated carrots (about 3 medium carrots)
100 g walnuts, roughly chopped
200 ml vegetable oil
3 large eggs, beaten
Crafting the Foundation
To prepare the cake base, meticulous attention is required to combine these ingredients effectively. The process involves a careful orchestration of flavors and textures:
Step 1: Mixing and Baking
Preheat the oven: Begin by preheating the oven to 180 ºC (160º Fan) mark 4. Prepare a 20cm x 30cm x 5cm deep baking tin by greasing and lining it.
Combine the ingredients: In a large mixing bowl, blend all the cake ingredients thoroughly using a large metal spoon or spatula until a well-combined batter is achieved.
Transfer to the tin: Place the batter into the lined tin and ensure it is evenly spread into the corners.
Step 2: Baking Perfection
Bake: Allow the cake to bake on the middle shelf of the oven for 35-40 minutes. The desired result is a golden, well-risen cake with a clean skewer test indicating its readiness.
Cooling Process: Once baked, let the cake cool in the tin for 10 minutes. Then, carefully transfer it to a wire rack to cool completely.
Crafting the Ricotta Frosting
The crowning glory of this carrot cake traybake lies in its ricotta frosting, a luscious blend of textures and flavors that elevate the dessert experience.
Ingredients for Ricotta Frosting
250 g tub ricotta
100 g soft unsalted butter
Zest of ½ orange, plus extra to decorate
175 g icing sugar
2 tsp. fresh thyme leaves, picked and finely chopped
Step-by-Step Frosting Magic
Step 3: Preparing the Frosting
Frosting creation: While the cake bakes, focus on crafting the ricotta frosting. In a medium mixing bowl, combine ricotta, soft unsalted butter, orange zest, icing sugar, and half the thyme.
Beating to perfection: Employ an electric mixer to beat the ingredients until well combined and fluffy, typically taking 2-3 minutes. Despite its initial looseness, the mixture will firm up upon chilling.
Step 4: Final Flourish
Chill the frosting: Cover and chill the frosting for about an hour to allow it to firm up slightly.
Assembling the masterpiece: Once the cake has cooled completely, generously spread the ricotta frosting over it, creating a smooth and tantalizing surface.
Finishing touches: Scatter the remaining thyme and additional orange zest over the frosting, adding a visual and aromatic finale to this springtime masterpiece.
Storage Tips
To ensure the longevity of this delectable creation, it is recommended to follow these storage guidelines:
Refrigeration: Cover and store the cake in the refrigerator for 2-3 days, maintaining its freshness and preserving the rich flavors.
Conclusion
In summary, the carrot cake traybake with ricotta frosting presents itself as a delightful culinary journey. From the carefully chosen ingredients to the meticulous preparation of the cake and the exquisite ricotta frosting, every step contributes to a symphony of flavors and textures. This recipe not only caters to the taste buds but also serves as a testament to the creativity and versatility that can be infused into traditional bakes. Perfect for springtime celebrations or as a comforting treat, this carrot cake traybake with ricotta frosting is a masterpiece waiting to be savored.
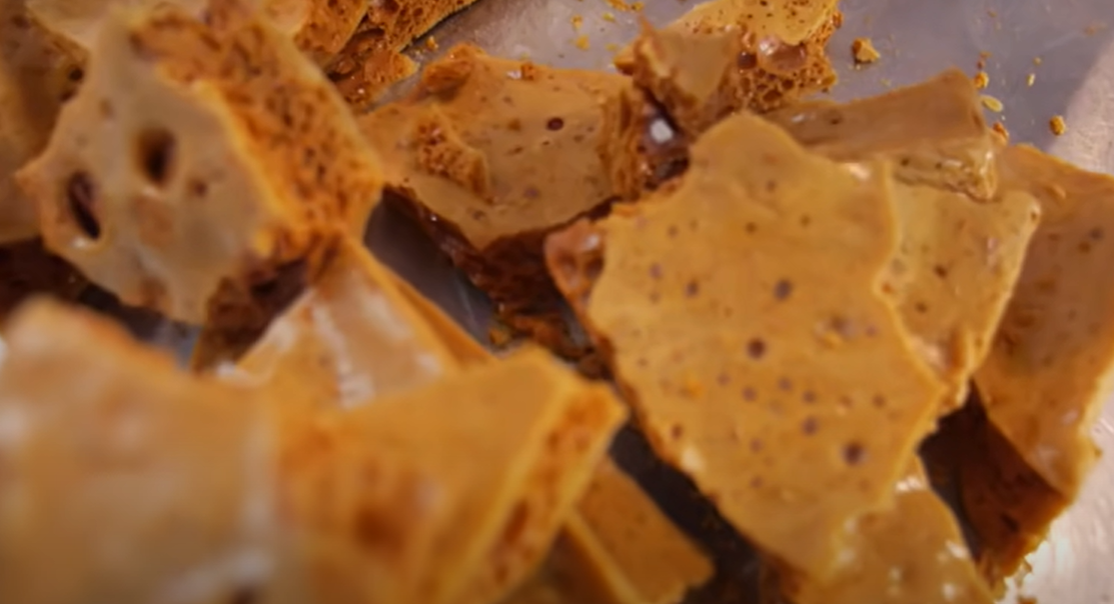
Discovering the art of making your own honeycomb at home is not only immensely satisfying but also a delightful lesson in the science of cookery. Commonly known as cinder toffee or hokey pokey, this sweet and crunchy treat is easy to make, and the quick process is both a spectacle and a joy. In this comprehensive guide, we’ll explore the ingredients, equipment, and steps involved in creating this delightful confection.
Homemade Honeycomb
Ingredients: Simple Yet Essential
To embark on your honeycomb-making journey, gather the basic yet essential ingredients: sugar, golden syrup, and bicarbonate of soda. These three components, when combined in a precise manner, transform into an aerated foam that becomes airy and brittle once set.
The Right Pan for the Job
Choosing the correct pan is crucial for a successful honeycomb adventure. Opt for a heavy-bottomed pan with high sides, as the mixture will foam up and rise rapidly once bicarbonate of soda is added. This pan ensures a safe and controlled cooking environment.
Golden Syrup Substitute
Encountered a pantry predicament without golden syrup? Fear not! Honey serves as an excellent substitute, ensuring the sweetness and stickiness required for your honeycomb creation.
Mastering the Cooking Process
Testing Readiness
Knowing when your honeycomb mixture is ready requires careful attention. Stir the sugar to dissolve it, but avoid letting the mixture come to a boil. Once the sugar has completely melted, increase the heat slightly and bring it to a simmer until it turns bubbly and amber in color. Aim for a hue resembling maple syrup; any darker, and the honeycomb may taste bitter.
Incorporating Bicarbonate of Soda
After achieving the desired caramelization, quickly remove the pan from heat to prevent further cooking. Add the bicarbonate of soda and stir vigorously with a wooden spoon until well combined. Witness the magical transformation as the bicarbonate turns the caramel into a bubbling, golden foam, creating characteristic pockets reminiscent of a sponge.
Setting the Honeycomb
The foamy mixture is ready to be poured into a buttered tin or dish lined with greaseproof paper. Exercise caution during this step, as the mixture is extremely hot. Allow it to set for a few hours, ensuring a safe distance from small children. Once fully cooled, break the honeycomb into shards or chunks, making it easier to enjoy.
Culinary Creativity with Honeycomb
Chocolate Dipping Delight
Take your honeycomb experience to the next level by dipping the pieces into melted chocolate, creating a homemade version of a Crunchie. For added texture, press nuts or dried fruit into the chocolate before it sets.
Versatile Culinary Companions
Explore various culinary possibilities with honeycomb. Mix it into a batch of Rocky Road, sprinkle it over frosted cupcakes, crumble it on top of iced cookies, or swirl it into a soft-set ice cream. Let your creativity run wild!
Storage Tips for Long-lasting Enjoyment
To ensure your cinder toffee maintains its delectable freshness, store it in an airtight container in a dry spot, such as your pantry. Proper storage enhances its shelf life, allowing you to savor the sweetness over an extended period.
Recipe: Crafting Your Own Honeycomb
Ingredients
200 g caster sugar
75 g golden syrup (or honey as a substitute)
2 tsp. bicarbonate of soda
Directions
Grease and line a deep baking tray, dish, or tin with parchment paper.
In a large, heavy-bottomed, high-sided saucepan over low heat, melt caster sugar and golden syrup without letting the mixture bubble.
Increase the heat until the mixture simmers, turning the caramel amber in color.
Remove from heat, add bicarbonate of soda, and beat vigorously until dissolved and foamy.
Pour the mixture into the prepared tin, being cautious due to its high temperature.
Allow it to set for 1 to 1.5 hours, then crumble or snap into shards for versatile enjoyment.
Embark on this culinary adventure, and enjoy the delightful process of making your own honeycomb – a treat that combines science, art, and pure joy in every bite.
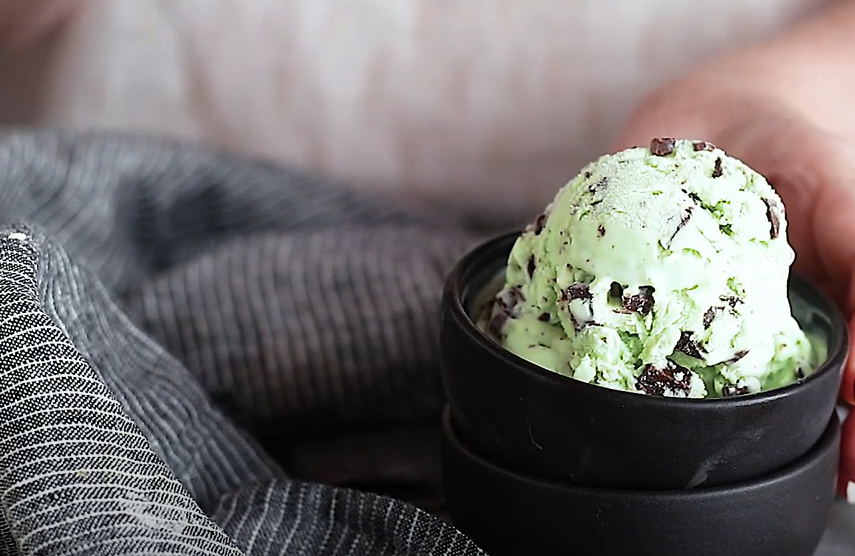
Heavenly Homemade Mint Chocolate Chip Ice Cream: A No-Churn Delight
Introduction
Indulging in the sweet, refreshing taste of mint chocolate chip ice cream is a delightful experience, and crafting it at home can be just as enjoyable. This no-churn mint chocolate ice cream recipe is not only delicious but also incredibly easy to follow. In just a few simple steps, you can create your own homemade cones, perfect for savoring during the summertime. Let’s dive into the details of this tempting treat, exploring the ingredients, step-by-step directions, and even a quick alternative for those pressed for time.
Mint Chocolate Chip Ice Cream
Ingredients: A Symphony of Flavors
Before embarking on the journey of creating this delectable no-churn mint chocolate ice cream, gather the following ingredients:
600 ml double cream
2 sprigs fresh mint, leaves picked
1 tbsp. cocoa powder (optional)
200 g condensed milk
2 tsp. vanilla extract
Pinch of flaky sea salt
75 g dark chocolate, finely chopped
100 g After Eights chocolates, roughly chopped
Step 1: Minty Infusion
The first step in this culinary adventure involves infusing the double cream with the invigorating essence of fresh mint. Add the mint leaves to the double cream, stirring to ensure a harmonious combination. Cover the mixture and let it chill overnight or for at least six hours, allowing the mint to impart its refreshing flavor into the cream.
Quick Tip: Peppermint Extract Shortcut
For those with limited time, an alternative option is available. If you don’t have the luxury of steeping the cream overnight, simply swap the fresh mint for half a teaspoon of peppermint extract. This quick substitution ensures you still capture the essence of mint without the extended infusion time.
Step 2: Peaks of Perfection
Once the mint has worked its magic, strain the infused cream into a bowl. Begin whisking until soft peaks form. At this stage, introduce the cocoa powder (if using), condensed milk, vanilla extract, and a pinch of flaky sea salt. Continue whisking until the mixture reaches stiff peaks, signifying a light and airy texture.
Step 3: Chocolaty Symphony
The heart of any mint chocolate chip ice cream lies in the chocolate. Stir in the finely chopped dark chocolate and the roughly chopped After Eights chocolates into the creamy concoction. This addition introduces delightful pockets of rich chocolate throughout the ice cream, creating a symphony of textures and flavors.
Step 4: Freezing Elegance
With the base prepared, it’s time to freeze the magic. Spoon the minty-chocolate blend into a 2-liter freezer-safe lidded container, ensuring an even distribution. Allow the ice cream to freeze for at least six hours or, for optimal results, overnight until it achieves a firm consistency.
Step 5: Savoring the Sweet Rewards
After patiently waiting for the ice cream to set, let it stand for about five minutes before scooping. This brief moment allows the texture to soften slightly, ensuring a smoother scooping experience. Serve the mint chocolate chip ice cream in your favorite cones, savoring the sweet rewards of your homemade creation.
Conclusion: A Culinary Triumph
In conclusion, crafting your own no-churn mint chocolate chip ice cream is a culinary triumph. From the infusion of fresh mint to the luscious addition of chocolate, each step contributes to the creation of a frozen masterpiece. Whether enjoyed on a scorching summer day or as a delightful treat year-round, this homemade ice cream is sure to tantalize the taste buds and leave a lasting impression. Embrace the joy of creating a timeless classic in the comfort of your own kitchen and relish every spoonful of this heavenly delight.